How to Create the Cubic Right Angle Weave

Instructions
Step 1
Cut a 3-foot length of stringing material. Thread a beading needle, leaving a 6-inch tail.
Step 2
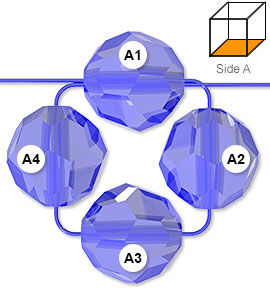
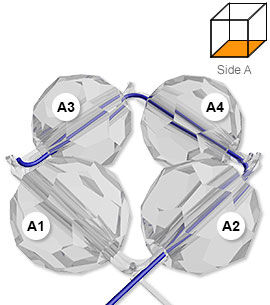
Pick up four beads. Pull the thread tight to create circle A, then tie a surgeon's knot. Trim the tail to approximately 1/2 inch length.
Pass the needle through an adjacent bead. This is now bead A1, as noted on the diagram.
Step 3
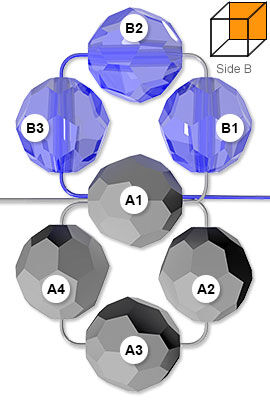
Pick up three beads then pass through A1. Pull tight to create circle B.
Step 4
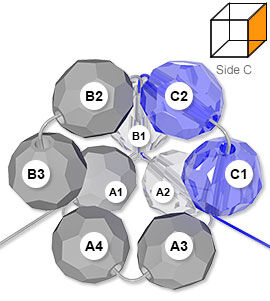
Pass through A2, pick up two beads then pass through B1 and A1. Pull tight to create circle C.
Step 5
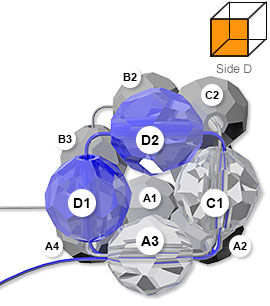
Pass through A3, pick up two beads, then pass through C1 and A3. Pull tight to create circle D.
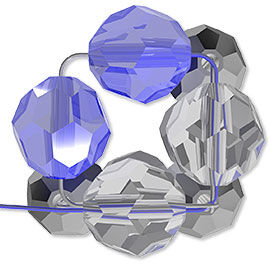
Step 6
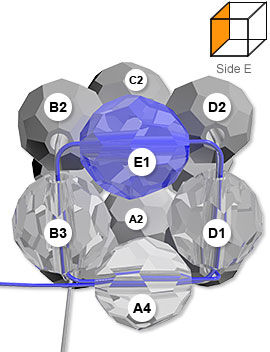
Pass through A4, pass up through B3, pick up one bead then pass down through D1. Pull tight to create circle E.
Step 7
Pass through A3, A2 and A1, then pass up through B3. Pass through E1, D1, C2 and B2 twice, pulling tight to create circle F (the top of the cube).
Step 8
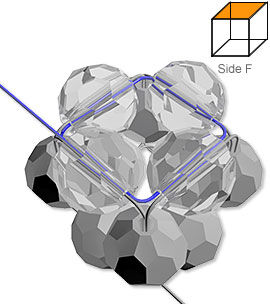
To lengthen the weave, circle F becomes circle A for the next cube, then repeat Steps 3 - 7 until the desired length is reached.
Shop for Your Materials Here:


Have a question regarding this project? Email Customer Service.
Copyright Permissions
All works of authorship (articles, videos, tutorials and other creative works) are from the Fire Mountain Gems and Beads® Collection, and permission to copy is granted for non-commercial educational purposes only. All other reproduction requires written permission. For more information, please email copyrightpermission@firemtn.com.